
English & Tamil Materials are available here
The Art of Carving

Handicraft Materials
India is a treasure trove of the most exquisite handicrafts available. Various raw Materials have lent themselves to an array of exotic items that are instantly captivating. The amazing diversity in Indian cultures and traditions, ensures variety in the transformation of every single material to a handicraft item. The deft hands of the craftsman breathes life into these Materials shaping them into beautiful pieces of art. Click on to read about the different Materials used in different parts of India, and the various handicraft items made out of them. Carving in India has been experimented and perfected upon various materials like metals, stone, wood, ivory etc. Traditional Indian designs carved into these materials create
 the most wonderful pieces of artwork. where a design is carved on the surface of a metal, which has been moulded in to the desired shape Stone Carving too holds an important place. Ivory, one of the most exquisite of materials has the most intricate of designs carved o n its surface. Kerala and Karnataka have a history in carving large works like palace doors, thrones, palanquins and chariots.
Aluminu
 m Crafts
Splendid designs with panache, Indian artisans produce marvelous work of aluminum crafts each unique in their own way blending perfectly the antique & contemporary art work.
Required Materials
A metal sheet- 3mm
Carving tools- 2
Dark colour paint
Paint brush
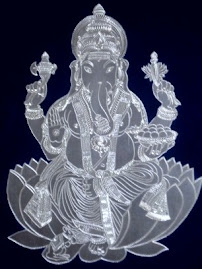
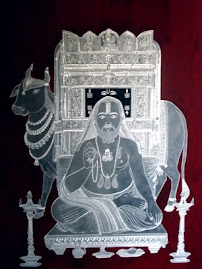
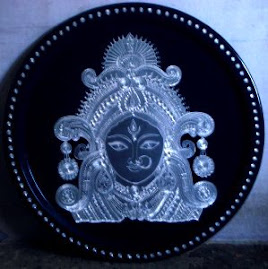
Picture you need to carve
You need necessary carving designer tools. If you don’t have the tools you could use a small screwdriver set which has points.
The tool is to be held in the palm, the thumb and the index finger is to be kept on the carving stick as though you are holding a pencil, and press over the traced line, turning the wrist to the right and left during each press, so that a designed zig zag kind of a border is drawn. This needs a little practice, so you could practice on a small piece of metal before proceeding with the final carving. You can use your judgement to decide which type of carving (i.e the small or big tool) is needed for each line of the picture. Once you get the hang of it, you will notice that you can move faster on each line and the carved line gets a more uniformed look.
When all the outlines have been carved, the remaining area which we carved should be painted fully and dry it. That’s all.


No comments:
Post a Comment